In This Article
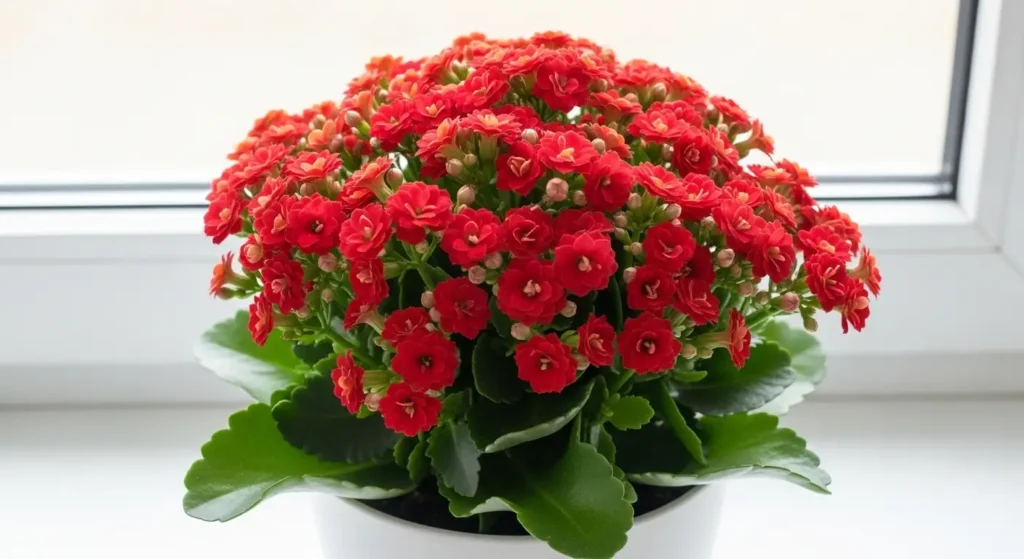
Meet the Calandiva plant (Kalanchoe blossfeldiana ‘Calandiva’) a double-flowered, rose-like bloomer native to Madagascar. This compact tropical succulent is beloved for its long-lasting, vibrant flowers and forgiving nature. Whether you’re a beginner or experienced gardener, the calandiva plant rewards even minimal effort with weeks of brilliant color.
Plant Care Card
| Feature | Details |
|---|---|
| Common Name | Calandiva |
| Botanical Name | Kalanchoe blossfeldiana ‘Calandiva’ |
| Family | Crassulaceae |
| Plant Type | Perennial succulent |
| Mature Size | 8–12 inches tall × 8–12 inches wide |
| Sun Exposure | Bright indirect light |
| Soil Type | Well-draining succulent/cactus mix |
| Soil pH | 6.0–6.5 |
| Hardiness Zones | USDA 10–12 (indoors elsewhere) |
| Native Area | Madagascar |
| Toxicity | Toxic to cats and dogs |
Calandiva Plant Care
Good news: the calandiva plant is genuinely easy to care for. The sections below cover everything from light and watering to propagation and common problems. You’ve totally got this even if you’ve struggled with houseplants before.
Light
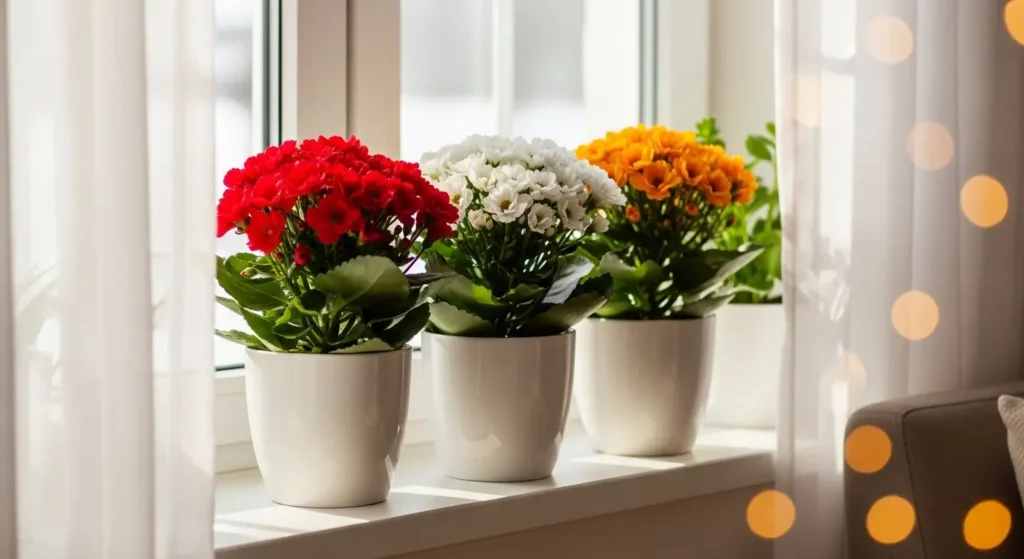
Calandiva loves bright indirect light around 6 hours daily. A south- or east-facing window is ideal. Direct midday sun scorches leaves, while too little light causes leggy stems and fewer blooms. If your calandiva plant isn’t flowering, low light is usually the culprit. Sheer curtains filter harsh sun perfectly.
Soil
Calandiva needs well-draining soil above everything else. A succulent or cactus mix works perfectly or mix 1 part potting soil with 1 part perlite. According to University of Florida IFAS Extension, proper drainage is critical for preventing root rot. Always use a pot with drainage holes!
Water
Water your calandiva plant when the top 2 inches of soil feel dry every 7–10 days in spring and summer, less in winter. Mushy stems mean overwatering; shriveled leaves mean underwatering. Similar habits apply to the watermelon peperomia. Never let your Calandiva sit in standing water.
Temperature and Humidity
Calandiva thrives between 60–85°F (15–29°C) basically normal room temperature. It tolerates average household humidity well with no misting needed. However, keep it away from cold drafts, heating vents, and air conditioning units. Sudden temperature swings stress the plant and cause premature flower drop. A stable, consistent spot is key.
Fertilizer
Feed your calandiva plant with a balanced liquid fertilizer (10-10-10) diluted to half strength every 2–4 weeks during spring and summer. Skip fertilizing in fall and winter when the plant is resting. According to Penn State Extension’s fertilization guidelines for houseplants, over-fertilizing can actually discourage blooming so don’t go overboard.
Types of Calandiva Plant
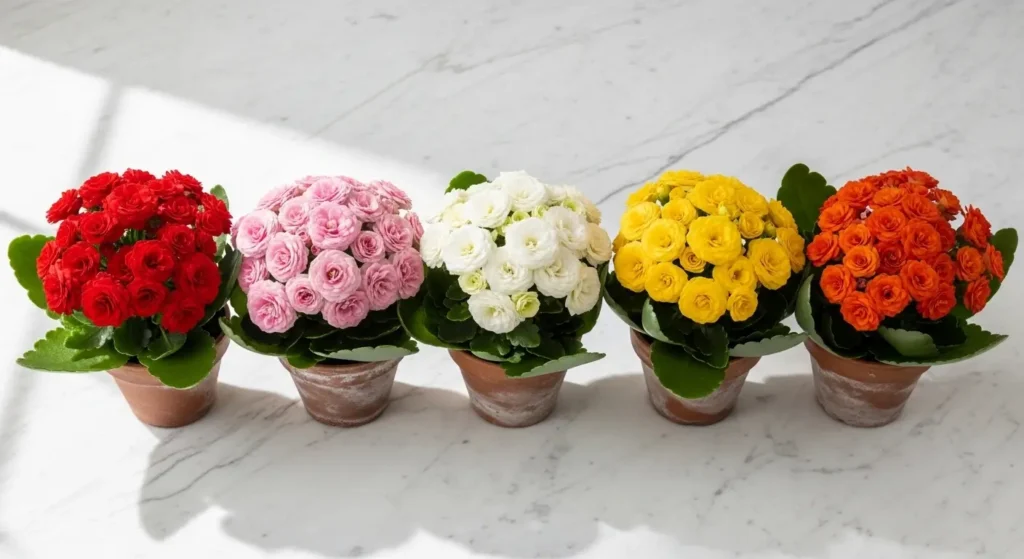
There are several popular Calandiva varieties worth knowing, each bringing its own color pop to your collection.
- Calandiva ‘Kerinci’ (Kalanchoe blossfeldiana ‘Kerinci’) — A classic double-flowered variety with deep red blooms. Compact growth habit makes it perfect for windowsills.
- Calandiva ‘Kerinci White’ — Same tidy form as ‘Kerinci’ but with crisp, pure white flowers. Elegant and surprisingly dramatic in a minimalist space.
- Calandiva ‘Kerinci Pink’ — Soft pink double blooms with a slightly frilly edge. One of the most popular varieties you’ll find in garden centers.
- Calandiva ‘Kerinci Orange’ — Warm, sunset-orange flowers that bring serious tropical vibes indoors. Great for bright, cheerful spaces.
- Calandiva ‘Kerinci Yellow’ — Sunshine yellow double blooms that look almost artificial, they’re so perfectly formed.
Pruning
Prune your Calandiva right after the flowers fade to keep it tidy and encourage future blooming. Simply deadhead spent flower clusters by snipping the stem just above a healthy leaf node using clean scissors or pruning shears.
If the plant starts looking leggy between blooms, you can trim back stems by up to one-third. This encourages bushier, more compact regrowth and gives you cuttings ready for propagation.
Propagating Calandiva Plant
The best time to propagate a calandiva plant is during spring or early summer when the plant is actively growing. Propagation is easier than you’d think just pick your method and go!
Propagating by Stem Cuttings
Stem cuttings are the most reliable way to multiply your calandiva plant. You’ll be amazed at how quickly they root.
Materials needed:
- Clean, sharp scissors or pruning shears
- Small pots (3–4 inches)
- Succulent/cactus potting mix
- Optional: rooting hormone powder
Steps:
- Step 1: Select a healthy stem with at least 2–3 leaf nodes and cut it about 3–4 inches long, just below a node.
- Step 2: Remove the bottom leaves, leaving 2–3 leaves at the top. Let the cut end air dry for 24–48 hours so a callus forms this prevents rot.
- Step 3: Insert the calloused end about 1 inch deep into slightly moistened succulent mix. You can dip it in rooting hormone first if you have it on hand.
- Step 4: Place the cutting in bright indirect light and water sparingly just enough to keep the soil from completely drying out.
Roots typically form within 3–5 weeks. Once you see new leaf growth, you’ll know it’s rooted successfully.
Propagating by Leaf Cuttings
Leaf propagation works similarly for the calandiva plant, though it’s a bit slower. This method also works well for the goldfish plant, another flowering houseplant that roots easily from cuttings.
- Step 1: Twist a healthy, plump leaf cleanly off the stem make sure the base is intact.
- Step 2: Let it dry for 24 hours, then lay it flat on moistened succulent mix.
- Step 3: Mist lightly every few days and wait. Tiny plantlets emerge at the leaf base within 4–6 weeks.
Potting and Repotting Calandiva Plant

Repot your calandiva plant every 1–2 years, or whenever you notice roots poking out of the drainage holes. Slowed growth and roots circling the pot are also clear signs it’s time for a new home.
Choose a pot just 1–2 inches larger than the current one. Going too big leads to excess soil moisture, which increases root rot risk. Always use a pot with drainage holes and fresh succulent mix when repotting.
The best time to repot is in spring, right before the growing season kicks off. Gently loosen the root ball, remove any mushy roots, and settle the plant into its new pot at the same depth it was growing before. This same repotting approach works well for the dumb cane plant, another compact indoor plant that benefits from a fresh pot every couple of years.
Common Pests and Diseases
Like most houseplants, the calandiva plant can occasionally attract a few unwelcome visitors. Catching them early makes all the difference.
Spider Mites
Look for fine webbing on leaf undersides and tiny, moving dots. Treat by wiping leaves with a damp cloth and applying neem oil or insecticidal soap spray.
Mealybugs
White, cottony clusters in leaf joints are the telltale sign. Dab them with a cotton swab soaked in rubbing alcohol, then follow up with neem oil.
Scale Insects
Brown, shell-like bumps clinging to stems and leaves. Scrape them off manually, then treat with horticultural oil to prevent reinfestation.
Aphids
Small, pear-shaped insects clustered on new growth. A strong stream of water knocks them off; follow up with insecticidal soap if they return.
Fungus Gnats
Tiny flies hovering near the soil? Let the soil dry out more between waterings to eliminate their larval habitat. Yellow sticky traps help catch adults.
For a broader overview of pest management, the University of California IPM Program offers solid, research-backed guidance on managing common houseplant pests organically.
Common Problems with Calandiva Plant
Here’s how to troubleshoot common issues:
Yellow Leaves
Yellow leaves are the most common worry with the calandiva plant but don’t panic, they’re usually fixable. Overwatering is the top cause: soggy soil leads to root rot, which prevents nutrient uptake. Let the soil dry out and check the roots. Nutrient deficiency is another culprit, especially in plants that haven’t been fed in months. Resume a balanced fertilizer routine. Sometimes, lower leaves simply yellow as the plant ages naturally totally normal. Similar yellowing issues pop up with arrowhead plants when they’re overwatered.
Brown Leaf Tips
Brown, crispy tips usually point to low humidity or underwatering the leaf tissue is drying out faster than the roots can supply moisture. Water quality matters too; fluoride and chlorine in tap water can cause tip burn over time. Switch to filtered or room-temperature water and move the plant away from heating vents.
Drooping or Wilting Leaves
Drooping is almost always a watering issue either too much or too little. Press your finger 2 inches into the soil: bone dry means water immediately; soggy means you need to back off and let it drain. The same drooping pattern shows up in nerve plants that are stressed from inconsistent watering. Once you fix the watering, most plants perk back up within a day or two.
Leggy Growth / Sparse Foliage
Stretched, leggy stems reaching toward the light are a sure sign your calandiva plant isn’t getting enough brightness. Move it closer to a bright window and prune back the longest stems to encourage fuller, bushier regrowth from the base.
FAQ
Is a Calandiva an indoor or outdoor plant?
Calandiva is primarily an indoor plant. It can go outside in warm climates (USDA zones 10–12) but thrives best as a bright-light houseplant year-round.
How do I take care of a Calandiva plant?
Give it bright indirect light, water when the top 2 inches of soil dry out, and feed monthly in spring and summer. Easy!
How long do Calandivas last?
With proper care, a Calandiva can bloom for 6–8 weeks per cycle and live for several years if you encourage re-blooming annually.
Are Calandiva perennial or annual?
Calandiva is a perennial succulent. It can bloom repeatedly each year with the right light manipulation during its dormancy period.