
In This Article
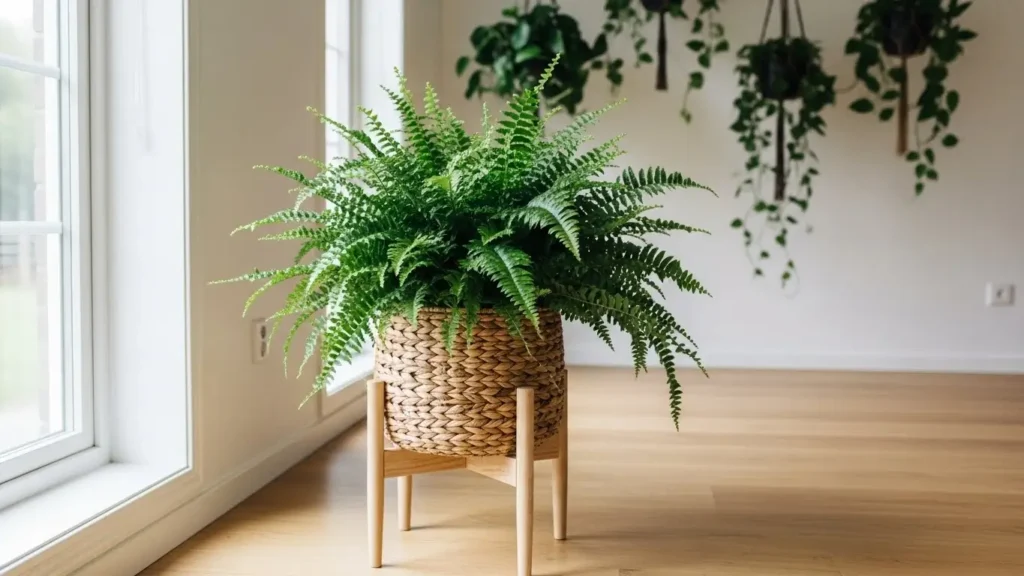
Honestly, if you’re looking for a fern that won’t make you pull your hair out, the Kimberly fern might just be your new best friend. This stunning plant (Nephrolepis obliterata) comes from Australia and boasts dense, fluffy fronds that look like something straight out of a fairy tale. Unlike its high-maintenance cousins, the Kimberly fern is surprisingly forgiving and adapts well to indoor conditions. It’s got that classic fern look we all love lush, green, and totally lush without the drama that usually comes with caring for ferns. Whether you’re a beginner or a seasoned plant parent, this beauty deserves a spot in your collection.
Plant Care Card
| Characteristic | Details |
|---|---|
| Common Name | Kimberly fern, Kimberly Queen fern |
| Botanical Name | Nephrolepis obliterata |
| Family | Nephrolepidaceae |
| Plant Type | Perennial, tropical fern |
| Mature Size | 2-3 feet tall, 2-3 feet wide |
| Sun Exposure | Bright indirect light to partial shade |
| Soil Type | Well-draining, rich, moisture-retentive |
| Soil pH | 5.5-6.5 (slightly acidic) |
| Hardiness Zones | 9-11 (USDA) |
| Native Area | Australia |
| Toxicity | Non-toxic to cats and dogs |
Kimberly Fern Care
The Kimberly fern is considered a moderate-care houseplant that’s easier than most ferns. In the following sections, we’ll cover everything from light requirements to troubleshooting common problems. You’ll love how straightforward this plant can be with just a little attention to its basic needs.
Light
Your Kimberly fern thrives in bright, indirect light think of a spot near an east or north-facing window. It can tolerate some morning sun, but harsh afternoon rays will scorch those delicate fronds faster than you can say “crispy fern.” Too little light makes the plant grow leggy and sparse, losing that full, bushy look we’re after. If you notice the fronds looking pale or stretched out, that’s your cue to move it closer to a light source. A bathroom or kitchen with good natural light works perfectly since these rooms often have higher humidity too.
Soil
This fern loves soil that’s rich, moisture-retentive, but still drains well basically, it wants to stay consistently moist without sitting in water. A quality potting mix designed for ferns or tropical plants works great. You can also make your own by mixing equal parts peat moss (or coco coir), perlite, and regular potting soil for that perfect balance. According to North Carolina State University Extension, proper drainage is crucial to prevent root rot in ferns while maintaining adequate moisture levels.
Water
Here’s where things get real watering is probably the most important part of Kimberly fern care. Keep the soil consistently moist but never waterlogged, which means checking it every few days during growing season. Stick your finger about 2-3 inches into the soil, and if it feels dry at that depth, it’s time to water thoroughly until water drains from the bottom. Overwatering leads to yellowing fronds and mushy roots, while underwatering causes brown, crispy edges. In winter, you can back off a bit since the plant grows slower, but don’t let it dry out completely. Similar watering needs apply to Boston ferns, another humidity-loving houseplant that thrives with consistent moisture.
Temperature and Humidity
Your Kimberly fern prefers temperatures between 60-75°F, which is perfect since that’s typical room temperature for most homes. It’s not picky about warmth, but it absolutely hates cold drafts and sudden temperature swings. Humidity is where this plant really shows its tropical roots it loves levels around 50% or higher. If your home is dry, especially in winter, consider using a humidifier, placing it on a pebble tray with water, or grouping it with other plants. Keep it away from heating vents, air conditioners, and drafty windows that can stress it out.
Fertilizer
Feed your Kimberly fern with a balanced liquid fertilizer diluted to half strength every 2-4 weeks during spring and summer. Stop or significantly reduce fertilizing in fall and winter when growth naturally slows down. Don’t overdo it ferns are sensitive to fertilizer salts, and too much can burn those beautiful fronds.
Propagating Kimberly Fern

The best time to propagate your Kimberly fern is during spring and summer when it’s actively growing. Let’s face it, making more of these gorgeous plants is easier than you might think!
Propagating by Division
Division is hands-down the easiest and most reliable way to multiply your Kimberly fern. This method works great when you’re repotting an overgrown plant anyway, so you’re basically killing two birds with one stone.
Materials needed:
- Sharp, clean knife or garden shears
- Fresh potting mix
- Pots with drainage holes
- Water
Step 1: Remove the entire plant from its pot and gently shake off excess soil so you can see the root system clearly. You’ll notice the plant naturally forms clumps with separate crowns that’s what you’re looking for.
Step 2: Using your clean knife or shears, carefully cut through the root ball to separate the plant into 2-3 sections, making sure each division has healthy roots and several fronds attached. Don’t go too small with your divisions or they’ll struggle to establish.
Step 3: Plant each division in its own pot with fresh, well-draining soil at the same depth it was growing before. Water thoroughly and place in bright, indirect light while they adjust to their new homes.
Step 4: Keep the soil consistently moist for the first few weeks while new roots develop. You should see new growth within 2-4 weeks if conditions are right. Just like with alocasia polly, division propagation gives you mature-looking plants almost immediately.
Potting and Repotting Kimberly Fern
Your Kimberly fern will need repotting every 1-2 years when you notice roots growing out of drainage holes or circling the pot’s surface. Spring is the perfect time to tackle this task since the plant is gearing up for active growth. Choose a pot that’s only 1-2 inches larger in diameter than the current one going too big can lead to overwatering issues. Gently remove the plant, loosen compacted roots if needed, and place it in the new pot with fresh soil. Make sure your new pot has drainage holes this is non-negotiable for healthy fern growth. Water well after repotting and keep it in a slightly shadier spot for a week while it adjusts.
Common Pests and Diseases
Like most houseplants, your Kimberly fern can occasionally attract pests, especially if growing conditions aren’t ideal. However, catching issues early makes treatment much simpler.
Spider Mites
Look for tiny webbing between fronds and stippled, yellowing leaves that appear dusty or dirty. Treat with insecticidal soap or neem oil spray, making sure to coat both sides of the fronds thoroughly and repeat weekly.
Mealybugs
These white, cottony pests hide in leaf crevices and along stems, sucking plant sap and leaving sticky residue behind. Remove them with rubbing alcohol on a cotton swab or spray with neem oil solution weekly.
Scale Insects
Scale appears as brown or tan bumps on stems and fronds that don’t move when touched but can be scraped off. Treat by manually removing visible scale, then spray with horticultural oil or insecticidal soap repeatedly.
Aphids
These tiny green, black, or brown bugs cluster on new growth and frond tips, causing distorted leaves and sticky honeydew. Blast them off with water or treat with insecticidal soap, repeating applications every few days.
Common Problems with Kimberly Fern
Here’s how to troubleshoot common issues with your Kimberly fern:
Yellow Leaves
Yellowing fronds are super common and usually not a death sentence for your plant. The most frequent culprit is overwatering, which suffocates roots and prevents them from absorbing nutrients properly let the soil dry out slightly between waterings. Additionally, nutrient deficiency can cause yellowing, especially if you haven’t fertilized in months, so resume regular feeding during growing season. Sometimes older fronds naturally yellow and die as the plant matures, which is totally normal if it’s just a few here and there. Trim off any yellow fronds at the base to keep your plant looking fresh. Similar issues occur with heart leaf philodendron when watering schedules get inconsistent.
Brown Leaf Tips
Brown, crispy edges on your Kimberly fern fronds are usually screaming for more humidity. Low humidity is the number one cause, so increase moisture around the plant with a humidifier or pebble tray. Water quality matters too chlorine and fluoride in tap water can accumulate in soil and cause tip burn, so try using filtered or distilled water instead. Underwatering can also create brown tips, so check your soil moisture regularly and adjust your watering schedule. Trim off the brown bits with clean scissors to improve appearance.
Drooping or Wilting Leaves
When your fern looks sad and droopy, it’s trying to tell you something about water. Underwatering is the obvious suspect if soil feels dry several inches down, give it a thorough drink immediately. However, overwatering can also cause wilting since waterlogged roots can’t function properly and the plant essentially suffocates. Check the soil moisture before taking action, and adjust accordingly based on what you find. Just like neon pothos, proper watering makes all the difference between a thriving plant and a struggling one.
Leggy Growth
If your Kimberly fern develops long, sparse fronds with gaps between leaves, it’s reaching for more light. This plant needs decent brightness to maintain that full, bushy shape it’s known for. Move it closer to a window or supplement with a grow light for several hours daily. You can also prune back leggy fronds to encourage bushier, more compact growth from the base. More light equals fuller, healthier fronds it’s that simple.
FAQ
Can a Kimberly fern take full sun?
No, Kimberly ferns can’t handle full sun, especially harsh afternoon rays. They prefer bright, indirect light or partial shade to prevent frond scorching and maintain their lush appearance.
Do Kimberly ferns come back every year?
Yes, Kimberly ferns are perennial plants that return yearly in zones 9-11. Indoors, they grow continuously year-round with proper care, though growth slows during winter months naturally.
What is the difference between a Kimberly fern and a Boston Fern?
Kimberly ferns have stiffer, more upright fronds and tolerate lower humidity better. Boston ferns have softer, more drooping fronds and require consistently higher humidity levels to thrive successfully indoors.
Do Kimberly ferns spread?
Kimberly ferns spread slowly through underground rhizomes, forming fuller clumps over time. They don’t spread aggressively like some ground covers but gradually increase in size, eventually requiring division or repotting.