In This Article
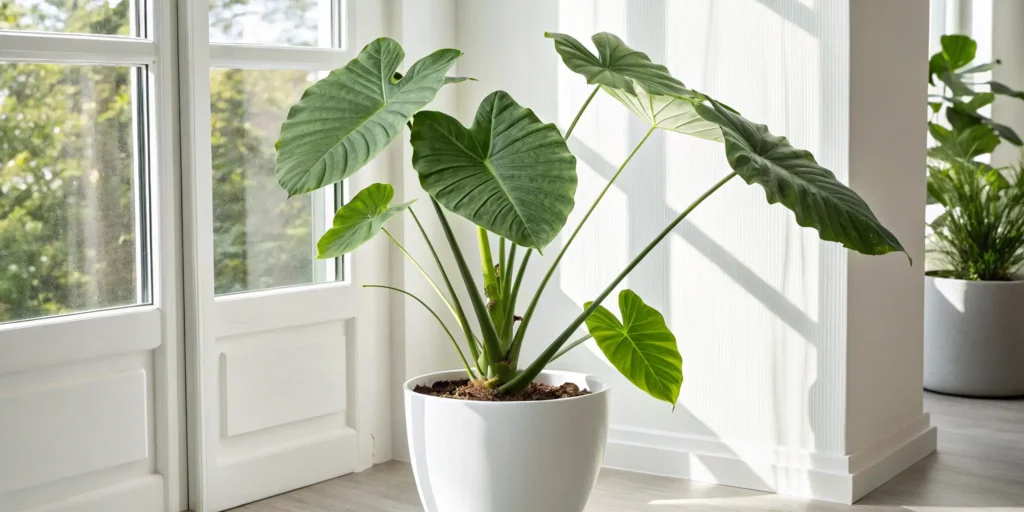
Alocasia Stingray plant (Alocasia macrorrhiza ‘Stingray’) is absolutely stunning with its unique ray-shaped leaves that look like they’re gracefully swimming through your home. This tropical beauty grows at a moderate pace, reaching 2-4 feet indoors, and is surprisingly easy to care for. It loves bright, indirect light and consistent moisture without being soggy. Just keep it away from pets since it’s toxic to curious cats and dogs.
Alocasia Stingray Plant Care
Let’s be real—caring for tropical plants can feel pretty overwhelming at first. However, once you understand what your Alocasia stingray plant actually needs, you’ll wonder why you hesitated so long to bring one home.
The secret is consistency. These plants thrive when they know what to expect from you day after day.
Light Requirements
Your Alocasia stingray plant is basically the Goldilocks of the plant world when it comes to lighting. It wants bright, indirect light—not too much, not too little, but just right.
Place it near an east or north-facing window where it gets plenty of brightness without those harsh afternoon rays. If you only have south or west windows, simply pull it back a few feet or hang a sheer curtain to filter the intensity.
When your Alocasia stingray plant doesn’t get enough light, it’ll start stretching toward the nearest light source, creating leggy growth with smaller leaves. Trust me, you’ll notice this change pretty quickly, and it’s not a good look.
Watering Your Tropical Beauty
Here’s where many plant parents stumble—watering their Alocasia stingray plant. This beauty likes consistent moisture but absolutely despises having wet feet sitting in soggy soil.
The golden rule: Water when the top inch of soil feels dry to your finger. During growing season (spring through summer), this typically means watering once or twice weekly. In winter, you can probably stretch it to every 10-14 days.
Always water thoroughly until you see it draining from the bottom holes. Yellow leaves usually signal either overwatering or underwatering—so check that soil moisture first before panicking!
Soil That Makes Them Happy
The perfect potting mix for your Alocasia stingray plant should drain well while still holding some moisture. I personally love mixing regular potting soil with perlite and a bit of bark or coco coir for extra drainage.
You can also grab a quality aroid mix from your local garden center if you prefer the convenience. The key is avoiding heavy, clay-like soils that stay waterlogged for days.
Remember: Good drainage prevents root rot, which is basically a death sentence for your Alocasia stingray plant. Make sure your pot has drainage holes—no exceptions here!
Temperature and Humidity Needs
These tropical beauties absolutely love warmth and humidity. Keep temperatures between 65-85°F, and try to avoid cold drafts or sudden temperature swings that can stress your Alocasia stingray plant.
Humidity is where things get really interesting. While they can tolerate average household humidity, they truly shine with 50-60% humidity or higher.
Here are some easy ways to boost humidity around your plant: • Use a humidifier nearby • Place on a pebble tray filled with water • Group with other tropical plants • Mist the air around the plant (not directly on leaves)
Fertilizing Schedule
During spring and summer growing months, feed your Alocasia stingray plant with a balanced, water-soluble fertilizer every 2-4 weeks. I usually dilute it to half strength because these plants can be quite sensitive to overfeeding.
In fall and winter, skip the fertilizer completely. Your plant is basically hibernating during these cooler months and doesn’t need extra nutrients.
Types of Alocasia Stingray Plant
The classic Alocasia stingray plant is pretty much a unique variety on its own, but you might occasionally find slight variations in leaf size or the intensity of that signature “stingray” shape.
Some growers have noticed that plants grown in different conditions can develop slightly different characteristics. For instance, plants grown in higher humidity might have more pronounced leaf shapes, while those in drier conditions tend to be more compact.
Don’t confuse your Alocasia stingray plant with other popular varieties like the Alocasia Frydek, which has its own distinctive dark green, velvety leaves with prominent white veining. The Stingray’s unique leaf shape with its distinctive “tail” and wing-like extensions makes it stand out in any plant collection.
The beauty of this particular variety is that each leaf tells its own story—no two are exactly alike, and the patterns can vary slightly as your Alocasia stingray plant matures and adapts to your specific home environment.
Pruning
Pruning your Alocasia stingray plant isn’t rocket science, but there are definitely right and wrong approaches. The main reasons you’ll want to prune are removing dead or yellowing leaves and keeping your plant looking its absolute best.
Always use clean, sharp scissors or pruning shears. I like wiping them down with rubbing alcohol between cuts to prevent spreading any potential diseases or problems.
Cut yellowing or damaged leaves right at the base where they meet the main stem. Don’t just trim the yellow parts—remove the entire leaf stem completely. This helps redirect the plant’s energy toward healthy new growth.
Best timing: Spring or early summer when your Alocasia stingray plant is actively growing. However, you can remove dead or dying leaves anytime throughout the year without worry.
Remember, some leaf loss is totally normal, especially during winter months or when your plant is adjusting to a new location. Don’t panic if you lose a leaf or two—it’s just part of their natural cycle.
Propagating Alocasia Stingray Plant
Propagation is basically plant magic, and honestly, it’s one of my favorite aspects of plant parenthood. The good news is that your Alocasia stingray plant is pretty straightforward to propagate through division.
The best time for propagating your Alocasia stingray plant is during repotting in spring or early summer. You’ll be looking for small offsets or “babies” that have developed their own root systems.
Here’s the step-by-step process: • Carefully remove your plant from its current pot • Gently brush away soil to clearly see the root system • Look for natural separation points where offsets have formed • Use clean hands or a sterile knife to separate the offset • Make sure each division has both roots and at least one growing point
After division, plant each section in its own pot with fresh, well-draining soil. Keep the soil slightly moist and place in a warm, bright location. You should see new growth within a few weeks if everything goes according to plan.
Potting and Repotting Alocasia Stingray Plant
Choosing the right pot for your Alocasia stingray plant is more important than most people realize. Go for something that’s only slightly larger than your plant’s current root ball—maybe 1-2 inches wider in diameter maximum.
Drainage holes are absolutely non-negotiable here. I don’t care how gorgeous that decorative pot looks—if it doesn’t drain properly, find a different one or use it as a decorative outer container.
For soil, stick with that well-draining mix we discussed earlier. You can buy a pre-made aroid mix or create your own blend with regular potting soil, perlite, and some bark chips for texture.
Most Alocasias need repotting every 1-2 years, or when you notice roots growing out of the drainage holes. Spring is absolutely perfect for this task since your Alocasia stingray plant will be entering its active growing season.
When repotting, be gentle with those roots—they can be quite fragile. Take your time and don’t force anything during the process.
Common Pests and Diseases
Unfortunately, even the most well-cared-for Alocasia stingray plant can attract unwanted visitors. The most common pests you’ll encounter are spider mites, mealybugs, and aphids lurking around your tropical beauty.
Spider mites are tiny and hard to spot initially, but you’ll notice fine webbing on leaves and small yellow or brown spots appearing. They absolutely love dry conditions, so increasing humidity often helps prevent infestations on your Alocasia stingray plant.
Mealybugs look like tiny cotton balls and tend to hide in leaf joints and stem crevices. They leave behind a sticky residue called honeydew that can attract additional problems down the line.
For treatment, I always start with insecticidal soap or neem oil spray. Both are gentle but effective options that won’t harm your plant when used correctly. Always test on a small area first and avoid spraying in direct sunlight.
Fungal issues like root rot usually stem from overwatering or poor drainage conditions. According to the University of California’s Integrated Pest Management Program, maintaining proper air circulation around houseplants significantly reduces the risk of fungal diseases and pest problems.
Common Issues with Alocasia Stingray Plant
Yellow leaves are probably the most frequent complaint I hear about the Alocasia stingray plant. Before you start worrying, remember that some yellowing is completely normal, especially on older, mature leaves.
However, if you’re seeing multiple yellow leaves simultaneously on your Alocasia stingray plant, it’s usually a watering issue that needs immediate attention. Too much water causes yellowing that starts from the bottom leaves upward, while insufficient water causes yellowing that begins at the leaf edges.
Brown, crispy leaf edges typically indicate low humidity or inconsistent watering practices. Try increasing humidity levels and making sure you’re watering thoroughly when the top inch of soil feels dry.
Drooping leaves can mean several different things—underwatering, overwatering, or even just your Alocasia stingray plant adjusting to a new environment. Check soil moisture first, then consider other environmental factors that might be affecting it.
Slow growth or unusually small leaves usually point to insufficient light conditions. Move your plant to a brighter location (but still indirect light) and see if things improve over the following weeks.
Just like caring for other tropical beauties such as Philodendron Melanochrysum, consistency in your care routine makes the biggest difference in preventing most common problems before they start.
FAQ
How do I properly care for a Stingray Alocasia?
Keep your Alocasia stingray plant in bright, indirect light with consistently moist but well-draining soil. Maintain temperatures between 65-85°F and provide extra humidity whenever possible. Water when the top inch of soil feels dry, and fertilize monthly during the active growing season.
Are Stingray Alocasias considered rare plants?
The Alocasia stingray plant isn’t extremely rare, but it’s definitely less common than basic Alocasia varieties you’ll find everywhere. You’ll have much better luck finding them at specialty plant shops or reputable online retailers rather than big box garden centers.
Can Alocasia Stingray thrive as an indoor plant?
Absolutely! While they’re native to tropical regions outdoors, the Alocasia stingray plant makes an excellent houseplant when given proper care and attention. They actually prefer the controlled indoor environment over the temperature swings of most outdoor climates.
How large does an Alocasia Stingray typically get?
Indoors, expect your Alocasia stingray plant to reach 2-4 feet tall with individual leaves spanning approximately 12-18 inches across. In ideal greenhouse conditions, they can grow larger, but most home growers see plants within this manageable size range.
1 thought on “Alocasia Stingray Plant: Easy Indoor Care & Growth Guide”
Comments are closed.