In This Article
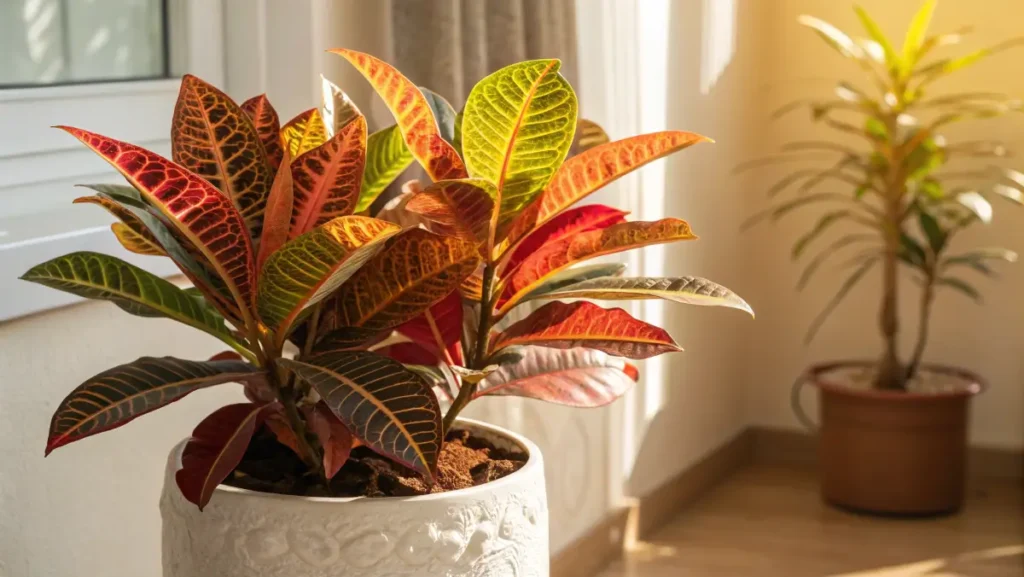
Croton Mammy (Codiaeum variegatum ‘Mammy’) is a showy houseplant adored for its twisted, multicolored leaves in shades of red, yellow, and green. This moderately growing tropical beauty can reach about two to three feet tall, making it a vibrant focal point in any space. It thrives in bright, indirect light and likes a regular watering schedule without soggy soil. Keep it out of reach of curious pets to be safe.
Croton Mammy Care
Light
Most folks notice how croton mammy practically glows under bright, indirect light. Honestly, it wants to be treated like a VIP in your home’s sunniest spot. A couple of hours of gentle morning sun is fine, though I’d avoid blasting it with intense midday rays. Too much direct sun can lead to leaf scorch, turning those gorgeous colors into unhappy brown patches.
Meanwhile, if you give it only dim corners, you might see the leaves become more green than kaleidoscopic. For balanced light, place it near a window that filters the sun through a sheer curtain.
Water
Croton mammy can be a bit choosy about its drinks. It likes to be watered when the top inch of soil feels dry, but it won’t appreciate being soaked nonstop. In other words, providing a thorough watering once it starts getting thirsty works best.
Over the years, I’ve learned that letting it dry out a bit in between watering sessions helps distinguish this plant’s radiant coloration from “slightly droopy but super colorful” to “proudly upright.” Also, be sure there’s a drainage hole so extra water can escape. When water sits at the bottom, roots can rot, and that’s never a fun outcome.
Soil
For me, a light, peat-based mix with a handful of perlite has always been a winner. Croton mammy enjoys decent moisture retention, but it won’t do well if it’s stuck in soggy soil for days. Having that extra bit of perlite helps with drainage and root aeration. If you notice the soil getting crusty or compacted over time, freshen things up by adding a new layer of potting mix. A happier root system usually means a more vibrant show of leaves.
Temperature and Humidity
Because croton mammy is naturally from a tropical environment, it asks for indoor temperatures around 65–80°F (18–27°C). Placing it near vents that blast cold air can shock it. If your home is super dry, you might see leaf edges browning or curling. To counteract that, I highly recommend a small humidifier or a pebble tray with water. This bit of extra moisture in the air helps maintain that perky, healthy look.
Fertilizer
Feeding croton mammy regularly during spring and summer can give it that extra pop of color. A balanced, water-soluble fertilizer (like 10-10-10) once a month is plenty. Moreover, take it slow and avoid dumping too much on the soil, or you could scorch the roots. In autumn and winter, cut back on fertilizing because that’s usually when the plant snoozes a bit more. A seasonal routine keeps it delighted year-round.
Types of Croton Mammy
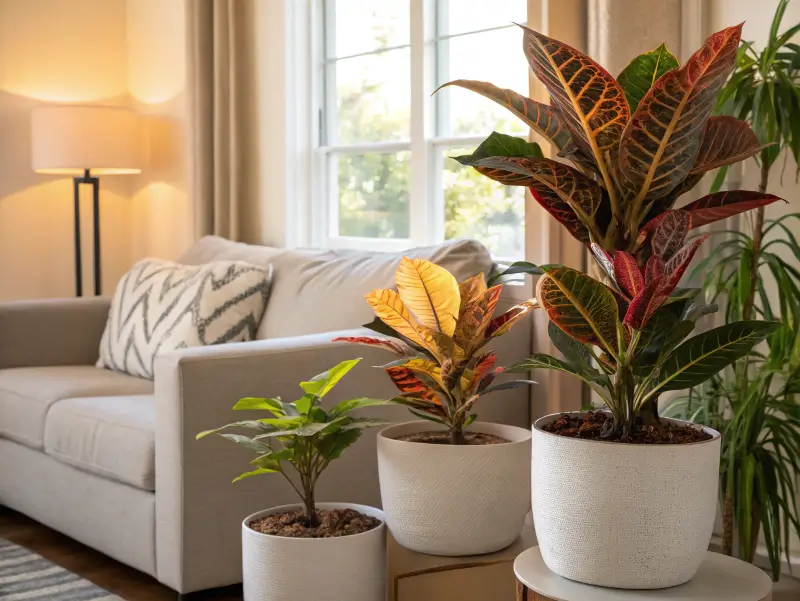
Croton mammy is catchy, but it’s not the only variety turning heads in the croton family. If you find yourself dreaming of more shapes and colors, you might be ready to start a croton collection.
Gold Dust Croton
This quirky one looks like someone flicked yellow paint specks all over its leaves. I once considered it the polka-dotted cousin to croton mammy, and it’s a great fit if you want something with a freckled look. If you’re curious to see more on that specific type, Gold Dust Croton offers plenty of playful speckles.
Croton Petra
This classic star in the croton world has robust, elliptical leaves with showy veins in yellows, reds, and oranges. I’ve placed it near my mammy for a vivid color contrast. If you’re looking for more tips, Croton Petra will give you a quick rundown.
Red Iceton
Leaves change color over time, going from pastel shades to bright reds and pinks. Under strong light, it’s like a slow-motion firework of new foliage.
Eleanor Roosevelt
Narrow leaves with lighter splotches, giving a slightly spotted effect. Tends to be a conversation starter among friends who haven’t seen such long, slender leaves on a croton before.
If you’re keen on general guidelines for all these colorful siblings, Croton Plant Care might help you create the perfect environment for any croton cultivar you bring home.
Pruning
Pruning is like giving croton mammy a fresh haircut. At first, I was afraid to take the shears to such a lively plant. But sometimes you spot a scraggly stem here or a yellow leaf there, and trimming becomes unavoidable.
Identify Overgrowth
If certain branches stretch too tall or start looking leggy, grab your clean pruners. Sometimes insufficient light can cause stems to grow lanky, so trimming back can boost a denser shape. This is especially helpful for colorful foliage plants like Croton Mammy, which benefit from regular pruning to maintain their vibrant, compact form.
Snip Above a Node
Aiming the cut just above a leaf node inspires branching. Think of it as telling your plant, “Grow in this direction, friend!”
Remove Dead or Yellowing Leaves
Avoid letting sad leaves sit there, draining energy. When leaves lose color or become crispy, I find it best to trim them right away.
Sanitize Tools
I can’t stress how essential it is to wipe your shears with rubbing alcohol or soapy water before and after each cut. Pests or pathogens can hitch a ride on your tools if you skip this step, especially when caring for plants like Croton Mammy, which can be sensitive to infections if wounds aren’t kept clean.
Moderate Approach
Over-pruning can shock croton mammy. In my case, I snip in small increments. This way, if I want to shorten bigger sections, I do it gradually to avoid plant panic.
Spring tends to be a popular time for pruning because that’s when new growth naturally kicks in, helping the plant bounce back quickly from any trimming session.
Propagating Croton Mammy

Propagating croton mammy might be one of the most satisfying experiences for plant lovers. It’s kind of like a science experiment mixed with the thrill of seeing potential new leaves.
Pick a Perfect Stem
Look for a healthy piece that’s not too old or too new, ideally with a few leaves. I’ve found medium-aged stems root more reliably than very young ones.
Prepare a Clean Cut
Snip the stem just below a node, and peel off any leaves that would be submerged if you’re rooting in water. The node is where fresh roots usually pop out.
Root in Water or Soil
Water Method: Place the stem in a glass of water where at least one node is underwater. Change the water weekly to keep things clean.
Soil Method: Tuck it into a pot of moist, well-draining soil, then cover it loosely with a plastic bag to increase humidity.
Stay Warm and Patient
Keep temperatures around 70–75°F. Check regularly for little white roots forming. It can take a few weeks, so don’t worry if you don’t see changes right away.
Transplant
Once roots look decently strong—maybe a couple of inches long—you can move your cutting to its own permanent pot.
Every time I see a fresh croton baby leaf emerge, I get way too excited. It’s proof that with some patience and a smidge of care, you can make new life spring forth.
Potting and Repotting Croton Mammy
Croton mammy might be a showstopper, but it still needs a comfy pot to continue impressing everyone. I learned the importance of picking the right container the hard way, once, I stuffed my croton into a pot way too big, and the soil stayed soggy for days.
Right-Size Pot
Go for a pot just an inch or two wider than the plant’s current home. Too large a jump can trap water, while a small pot can stunt growth altogether, something to keep in mind when repotting vibrant growers like Croton Mammy, which thrive with just the right amount of root space.
Always Drain
A pot without drainage holes is a recipe for mushy roots. If your container is decorative and lacking holes, pop in a plastic liner pot with drainage so water can flow out.
Awesome Mix
Combining peat-based soil with perlite is a winning move. This blend holds enough moisture without creating a swamp at the bottom.
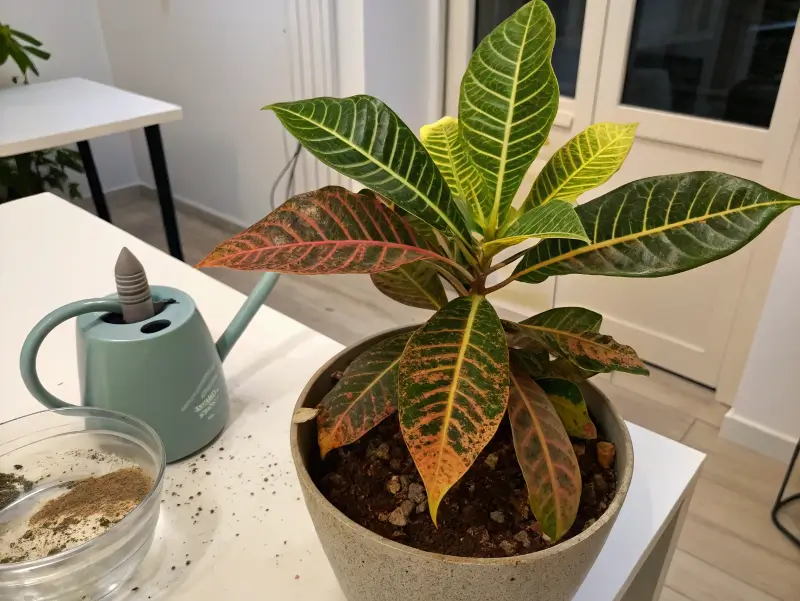
Repotting Routine
If you see roots poking out of drainage holes or the topsoil dries almost instantly, that’s a clue croton mammy feels cramped. Repot in spring or summer if possible, so the plant has time to settle in.
Gentle Transition
Slide the plant out by supporting the base. Loosen any tangled roots, then nestle it into the new pot at the same depth. Fill in around it with fresh soil, and give it a small drink to help the roots settle. This gentle approach works especially well for Croton Mammy, which can be sensitive to transplant shock if handled too roughly.
A quick tip: repotting is also a good time to check for any hidden pests or issues lurking in the soil. Early detection can save you from bigger headaches later.
Common Pests and Diseases
Croton mammy, like many houseplants, might occasionally become a party spot for pests. Sometimes I think it’s because these insects go after vibrant leaves, but who knows, maybe they just like the warmth.
- Spider Mites: They’re notorious in dry environments, spinning tiny webs under leaves. Boosting humidity can chase them away, and a gentle insecticidal soap or neem oil spray can handle more severe cases.
- Mealybugs: These white, cotton-like patches might appear on stems or leaf joints. A cotton swab dipped in alcohol can wipe these critters off quickly.
- Scale Insects: These guys look like small brown or black bumps. I usually rub them off gently or resort to neem oil if it’s a heavier infestation.
- Root Rot: This is more a water-related disease than a pest, but if your croton mammy sits in waterlogged soil, fungal trouble can set in. Snip away rotted roots and repot in fresh, airy soil if you suspect this.
- Fungal Leaf Spot: You might see circular, discolored spots on leaves. Removing infected foliage and using a mild fungicide can limit the spread.
Doing a quick check for pests every week or two keeps you ahead of surprises. If you need more detailed info on pests for indoor or outdoor plants, a handy resource is the USDA website, which offers plenty of articles on plant-related topics. Checking your leaves and soil regularly is simpler than trying to fix a full-blown outbreak later.
Common Issues With Croton Mammy
Croton mammy looks striking most of the time, but it can throw mini tantrums now and then. I’ve run into a few experiences that rattled me before I realized they were normal plant gripes.
Leaf Drop
If you just brought the plant home, slight leaf shedding during its adjustment phase can happen. Dramatic environment changes, like going from a greenhouse to your living room, make it let go of older leaves. However, consistent dropping in Croton Mammy could signal drafts or irregular watering.
Yellow Leaves
Overwatering is the usual suspect here. If the soil’s consistently damp or if you see puddles after watering, it’s time to back off. Let the topsoil dry a bit more or try a pot with better drainage, especially important for Croton Mammy, which dislikes soggy roots.
Dull Foliage Colors
When croton mammy is starved of light, its fireworks-like colors fade. Moving it closer to a bright window or giving it a few hours under a plant light might revive those reds and oranges.
Leggy Stems
If you see bare stems with leaves mainly at the top, that’s a hint it’s not receiving enough rays. Sometimes a gentle pruning of the top and shifting it to more sunshine fixes that in no time, particularly for Croton Mammy, which thrives in bright, indirect light to stay full and colorful.
Browning Edges
Low humidity or a lack of water can cause crispy edges. Checking the moisture level more frequently helps. Also, a small humidifier can be a game-changer if you live in a dry climate.
By keeping an eye on these typical hiccups, you’ll be more confident addressing any croton mammy quirk that crops up.
FAQ
How do you care for a croton mammy?
Give it bright, indirect light, water when the topsoil is dry, and maintain warm indoor temperatures. Also, feed it with a balanced fertilizer during growing seasons and watch humidity levels, Croton Mammy can get cranky if conditions aren’t just right.
How big does a Mammy croton get?
Indoors, it typically hits about 2–3 feet tall and 1–2 feet wide, although the exact size depends on pruning and light availability.
Can mammy crotons take full sun?
They can handle a bit of gentle morning sun, but direct midday rays may scorch the leaves. It’s wiser to let them adjust gradually to stronger light, especially true for Croton Mammy, whose vibrant foliage can fade or burn under harsh conditions.
Do crotons like full sun or shade?
They thrive with bright, indirect light. However, some varieties can do well in partial sun if introduced slowly. Total shade, though, can mute the plant’s vibrant leaf colors.
2 thoughts on “Croton Mammy: Proven Care & Growing Guide”
Comments are closed.