In This Article
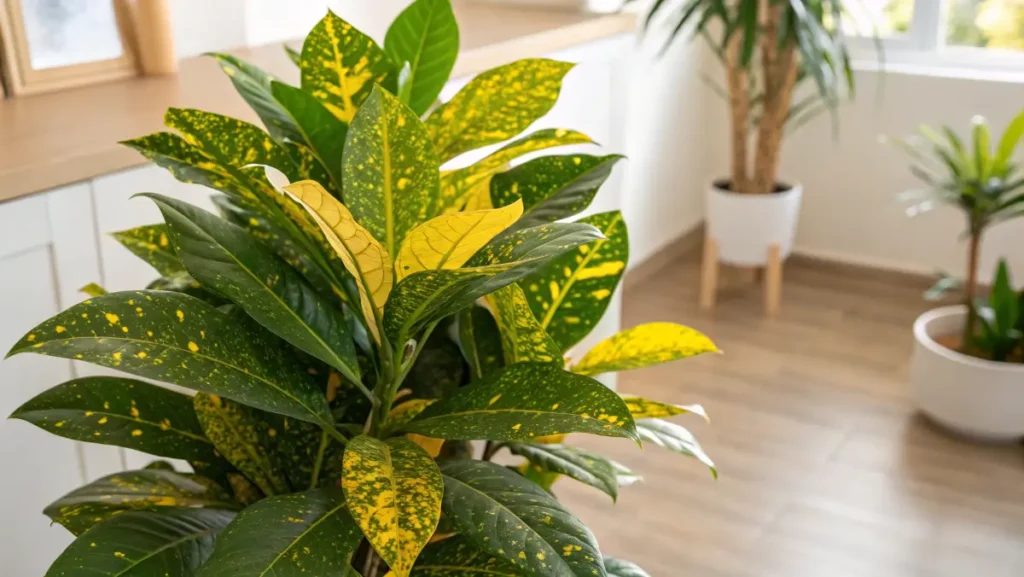
Gold dust croton (Codiaeum variegatum ‘Gold Dust’) is known by many houseplant fans for its bright yellow flecks dancing across glossy green leaves. Honestly, it’s a total scene-stealer in any indoor garden. This tropical shrub grows at a moderate pace, reaching around three feet tall under the right conditions. It thrives with bright, indirect light, a balanced watering routine, and steady warmth. Keep pets away, though—gold dust croton isn’t exactly pet-friendly. Overall, it’s a spirited, easygoing houseplant that shows off its starry speckles all year long.
Gold Dust Croton Care
So, you’ve got yourself a gold dust croton–or it’s on your wish list–but you’re not totally sure what it needs. No worries! Taking care of this tropical marvel can be pretty straightforward once you know the basics. Think of it like giving a rainforest-hugging friend a comfy spot in your home: they want cozy temperatures, decent light, and a little humidity now and then.
Light
- Bright, indirect sun is ideal. A bit of early morning or late-afternoon sunshine can make those spotty leaves look extra brilliant.
- Shade is tolerated, but you may see the yellow splotches fade if the plant sits in darkness too long.
- Rotate the pot every week or two. Because gold dust croton tends to reach toward the light, turning the container helps it grow more evenly.
Water
- Moderate watering is your friend. Let the top inch of the potting mix dry before giving the plant a drink.
- Avoid letting the croton soak in water. Soggy soil leads to droopy leaves and unhappy roots.
- In my house, the gold dust croton drops a leaf or two whenever I ignore its subtle clues for water, so I check the soil weekly.
Soil
- A well-draining, peat-based mix with perlite or coarse sand prevents excess moisture from sticking around.
- Keep the pH neutral to gently acidic. Too dense a mix can stunt growth or cause leaf yellowing.
- One trick is to toss in a bit of orchid bark or coconut coir for extra air pockets.
Temperature and Humidity
- Warm temps between 65–80°F (18–27°C) make gold dust croton happy. Keep it away from drafty windows or blasting air vents.
- Aim for moderate to high humidity. Dry air can dull leaf color or cause crispy edges.
- Place the pot on a pebble tray or mist occasionally if your home runs on the dry side. If your gold dust croton starts shedding leaves, bumping up humidity or adjusting watering might help.
Fertilizer
- Light feedings every 2–4 weeks in spring and summer with a balanced, water-soluble formula at half strength works great.
- Relax on the fertilizer in fall and winter when the plant isn’t pushing out as much new growth.
- Watch out for brown leaf tips—sometimes it means you’ve gone a bit heavy on the fertilizer.
- For more suggestions on feeding schedules, you can visit this Croton Plant Care page. It covers various croton tips that I’ve found super helpful.
And if you’re wondering about official pointers on tropical plants, the USDA website sometimes provides general growing guidelines. It never hurts to check an established resource for overarching plant advice.
Types of Gold Dust Croton
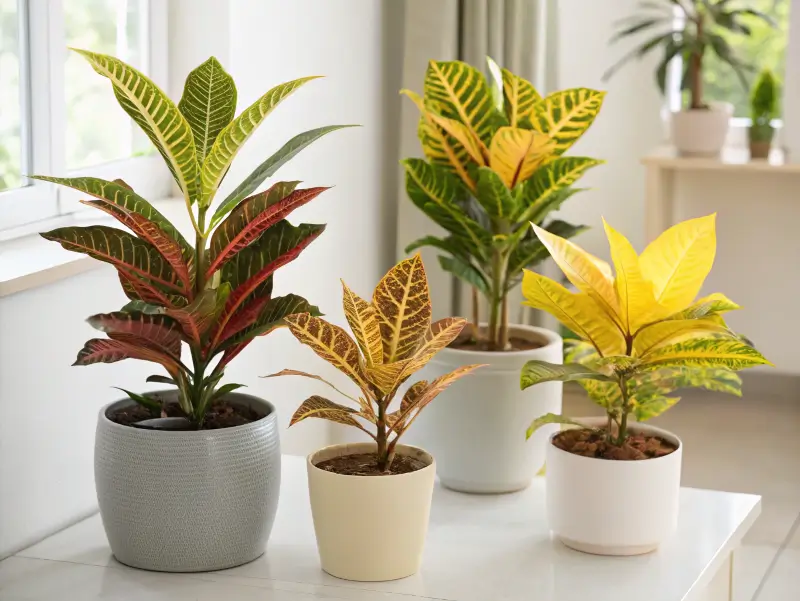
Most folks focus on gold dust croton first, but there’s a whole lineup of crotons out there—each with a unique twist. I’m a big fan of variety because it adds so much color and shape to a plant collection.
- Gold Star Croton
If you love narrow, long leaves with bright veins, this might be your star. It’s a bit quirkier in shape. - Petra Croton
Known for bigger, leathery leaves. These hotshots show off streaks of green, yellow, and red. If you’re curious, you can find details on Croton Petra as well. - Yellow Iceton Croton
New leaves pop out in neon yellow, eventually mellowing into deeper tones as they grow. - Oak Leaf Croton
Shaped somewhat like an oak leaf—talk about a conversation starter!
Of course, gold dust croton stands out for its polka-dot look, which is pretty hard to beat. Over time, your gold dust croton might even outshine other cultivars in a well-lit corner. It’s definitely earned its flashy reputation.
Pruning
From time to time, your gold dust croton can look scraggly or overextended. That’s your sign to give it a little haircut. When I trim my gold dust croton each year, it always seems to bounce back with fresh, new growth.
- How to Prune
Clip away brown or yellow leaves with sanitized shears. This prevents any potential spread of disease.
If your gold dust croton gets too tall or leggy, snip back the branch just above a leaf node. This encourages more branching and a bushier plant. - When to Prune
Most folks do this in spring or early summer. The plant is already eager to grow, so it tends to recover nicely.
If you prune in colder months, the regrowth might be slower, which isn’t necessarily bad—it just means less immediate action. - Keep it Simple
A minor trim can work wonders for shape. My biggest regret once was waiting too long, so learn from my mistake and keep an eye on your plant’s form.
Propagating Gold Dust Croton
If you want more gold dust croton without running to the nursery, propagation is the way to go! It’s like plant magic, watching a lone stem transform into a brand-new potted companion.
Stem Cuttings
- Pick Healthy Growth
Choose a vibrant stem with several leaves. - Cut & Root
Snip a 4–6-inch segment just below a leaf node and dip the end in rooting hormone (optional, but helpful). - Pot It
Place the cutting in moist potting mix, keep it warm, and maintain humidity. - Patience
Roots often appear within a few weeks. A snug plastic bag around the pot can lock in moisture, but don’t let it get soggy.
Propagating your gold dust croton this way is straightforward and fun for beginners. It’s also a cool party trick to share with fellow plant geeks.
Air Layering
- Make a Tiny Wound
A small cut on a healthy stem is all you need. - Add Moss
Wrap damp sphagnum moss around the cut and secure it with plastic. - Monitor
Keep an eye on moisture levels. If it dries out, spritz it. - Separate
Once you see roots through the moss, cut below the new roots and pot it up.
I’ve only tried air layering once, and it felt like a mini science experiment, but it worked! The new gold dust croton has been thriving.
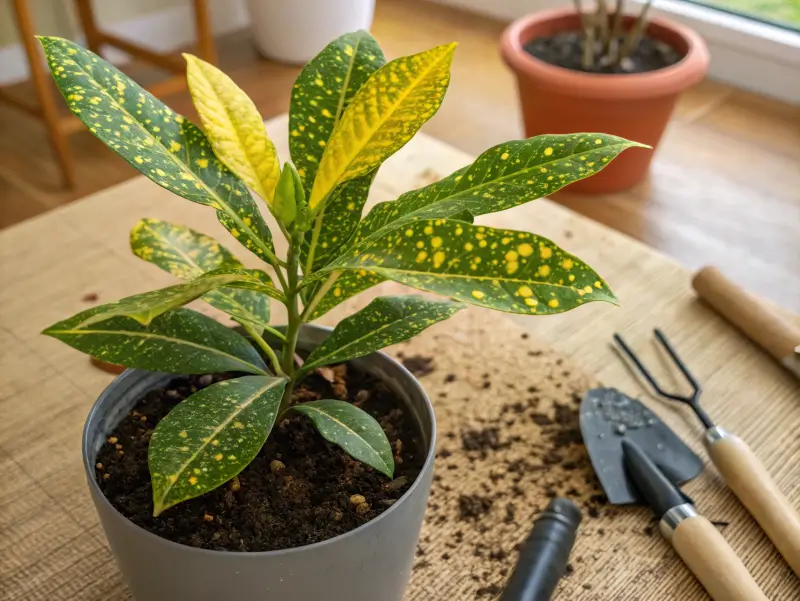
Potting and Repotting Gold Dust Croton
I love repotting my gold dust croton whenever I see wonky roots poking out the bottom. It’s kind of like giving your plant a fresh outfit—very satisfying.
Container Choice
- Pick a pot that’s one size bigger than your current container. Crotons don’t enjoy massive, empty soil spaces, as it can lead to overwatering.
- Drainage holes are a must. Without them, water puddles around the roots, leading to rot.
Potting Mix
- A light, airy mix works best. Just a standard houseplant soil plus perlite or coarse sand.
- Avoid any heavy, clay-like substrate or you’ll risk root rot.
- Place a thin layer of soil at the bottom, position the plant, then fill gently around the sides.
Repotting Signs
- Roots bulging out the drainage holes is clue number one.
- The soil might dry super fast, hinting that roots occupy most of the pot.
- When you pop the plant out, if the root ball is a tangled mess, it’s time for a bigger home.
One time, I mistakenly placed my gold dust croton in a pot that was way too large. The poor thing was swimming in damp soil for weeks, and it started to wilt. I moved it back to a snugger pot, and it perked up like nothing ever happened.
Common Pests and Diseases
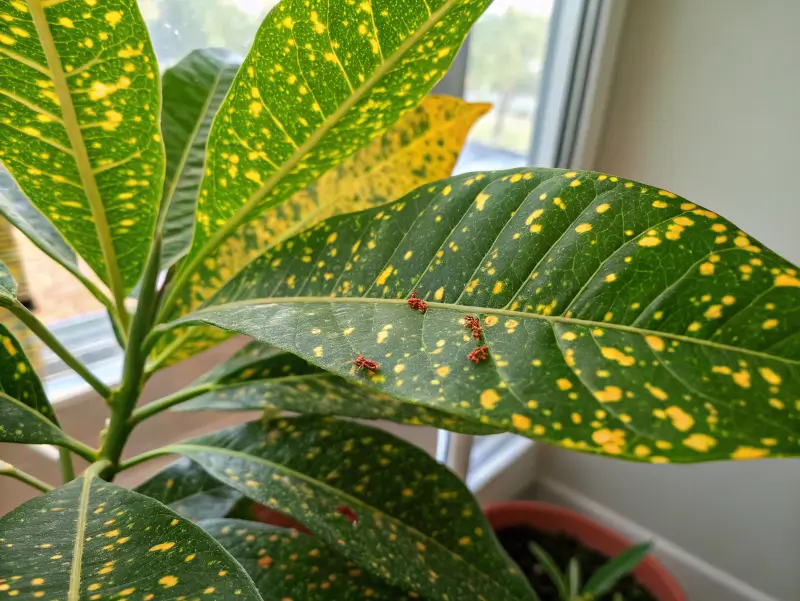
Like any tropical houseplant, gold dust croton can get bugged by uninvited visitors or develop fungal issues in damp conditions. Luckily, these problems are usually easy to handle if you catch them early.
Pesky Insects
- Spider Mites: Look for tiny webs on leaf undersides or a dusty appearance. A thorough rinse and insecticidal soap can help.
- Mealybugs: They appear as white cottony clumps near leaf nodes. Dabbing them with an alcohol-soaked cotton swab does wonders.
- Scale: Small, hard bumps on stems. Gently scrape them off or use neem oil soap to loosen them.
Watch out for these pests on your gold dust croton occasionally, especially after bringing it home from a nursery or transplanting. A quick quarantine of new plants can spare you future headaches.
Fungal Troubles
- Root Rot: Usually from constant soggy soil. If the plant looks wilted, yet the soil is soaked, that’s a red flag.
- Leaf Spot: Can show up from overhead watering or lingering moisture on leaves. Remove affected leaves and water at the base instead.
I had spider mites once, and they nearly had a field day on my gold dust croton. A quick shower and diligently checking leaves for webs saved the plant from further harm.
Common Issues With Gold Dust Croton
Despite its flair, your gold dust croton may run into hiccups once in a while. Don’t panic, most issues are fixable with a small tweak or two.
Yellow Leaves
- Overwatering is a usual suspect. If the soil stays wet for too long, leaves can start yellowing.
- Check for drainage and cut back on watering if you find the soil soggy.
- In some cases, it can be a nutrient question—maybe too much fertilizer or too little.
Leaf Drop
- Temperature swings or cold drafts often trigger sudden leaf loss. If your AC or heater is blasting close by, you might see leaves dropping in protest.
- Sometimes a big schedule shift or moving the plant can shake it up, too.
Wilting or Curling
- Typically, that means underwatering or temps that are too hot.
- Keep an eye on how quickly the soil dries. If it’s bone-dry, water thoroughly.
- A gold dust croton may occasionally show limp leaves if it’s stressed by scorching sun or lack of moisture.
I once forgot about watering during a busy workweek. My plant’s leaves drooped dramatically, practically begging for a drink. A solid watering session revived it, and we were back on speaking terms.
FAQ
How do you take care of a gold dusted croton?
Give it bright, indirect light, moderate watering, and a warm, humid environment. Keep drafts away and fertilize lightly in the growing season. Your gold dust croton should reward you with steady growth and those flashy speckles.
How big do gold dust crotons get?
Indoors, gold dust croton typically peaks around 2–3 feet tall, making it an awesome tabletop or floor plant. Outdoors in toasty climates, it may grow a bit taller.
How much light does it need?
It loves bright, indirect sun. Without sufficient light, you might notice fewer yellow spots and more plain green in the foliage.
Is it an indoor or outdoor plant?
Gold dust croton can do well both indoors and outdoors, provided temperatures don’t dip below 60°F. Safety in a cozy indoor spot is usually best if you live in a cooler region. When caring for your gold dust croton outside, shade it from the harsh midday sun.
2 thoughts on “Gold Dust Croton : The Ultimate Care and Growing Guide”
Comments are closed.